I'm experimenting with writing a service broker in .NET Core that conforms to the Open Service Broker API specification. This is part 1 of a series of posts that explores all service broker details from a .NET perspective. All posts in the series:
- Marketplace and service provisioning (this post)
- Service binding
- Provisioning an Azure Storage account
- Binding an Azure Storage account
Setting the stage
I this first part, the goal is to write a service broker that:
- exposes a catalog on the
/v2/catalogendpoint - allows us to provision a service instance
- allows us to deprovision a service instance
So we do not yet implement binding or unbinding, this is for a follow-up post.
A service broker allows a platform to provision service instances for applications you or someone else writes. The platform I chose to test my service broker on is Pivotal Cloud Foundry (PCF). A public implementation of this platform that is hosted and managed by Pivotal can be found at https://run.pivotal.io.
To tell the service broker what to do I will use the CF CLI which can be used to push applications to the platform, create service instances and bind them to applications (among a lot of other things).
All source code for this blog post can be found at: https://github.com/orangeglasses/service-broker-dotnet/tree/master.
OSBAPI library for .NET
Lucky for me, there is no need to implement the OSBAPI spec myself. An excellent open source OSBAPI client and server implementation already exists for .NET: https://github.com/AXOOM/OpenServiceBroker. The server library implements the entire OSBAPI interface and provides hooks you must implement to actually (de)provision and (un)bind and fetch services and service instances.
When implementing a service broker for some underlying service, you have to make a choice between implementing synchronous or asynchronous (de)provisioning and (un)binding. If the platform (PCF) and the client (CF CLI) support it, requests to the service broker contain the accepts_incomplete=true parameter. This indicates that the platform supports polling the latest operation to check for completeness. In this case, both PCF and CF CLI support asynchronous operations.
If we want to make our service broker as generic as possible, we should implement the blocking version of the API because not all platform may support asynchronous provisioning. Therefore, for this post, we just implement IServiceInstanceBlocking. In a later post we'll explore asynchronous provisioning.
Catalog
The starting point for any service broker is its catalog, exposed on the /v2/catalog endpoint. When using the OpenServiceBroker.NET library we need to implement the ICatalogService. For this post we start with a simple catalog:
loading...
A catalog has services with some properties and a service has plans, nothing fancy yet. We can already deploy the application that exposes this service catalog to PCF:
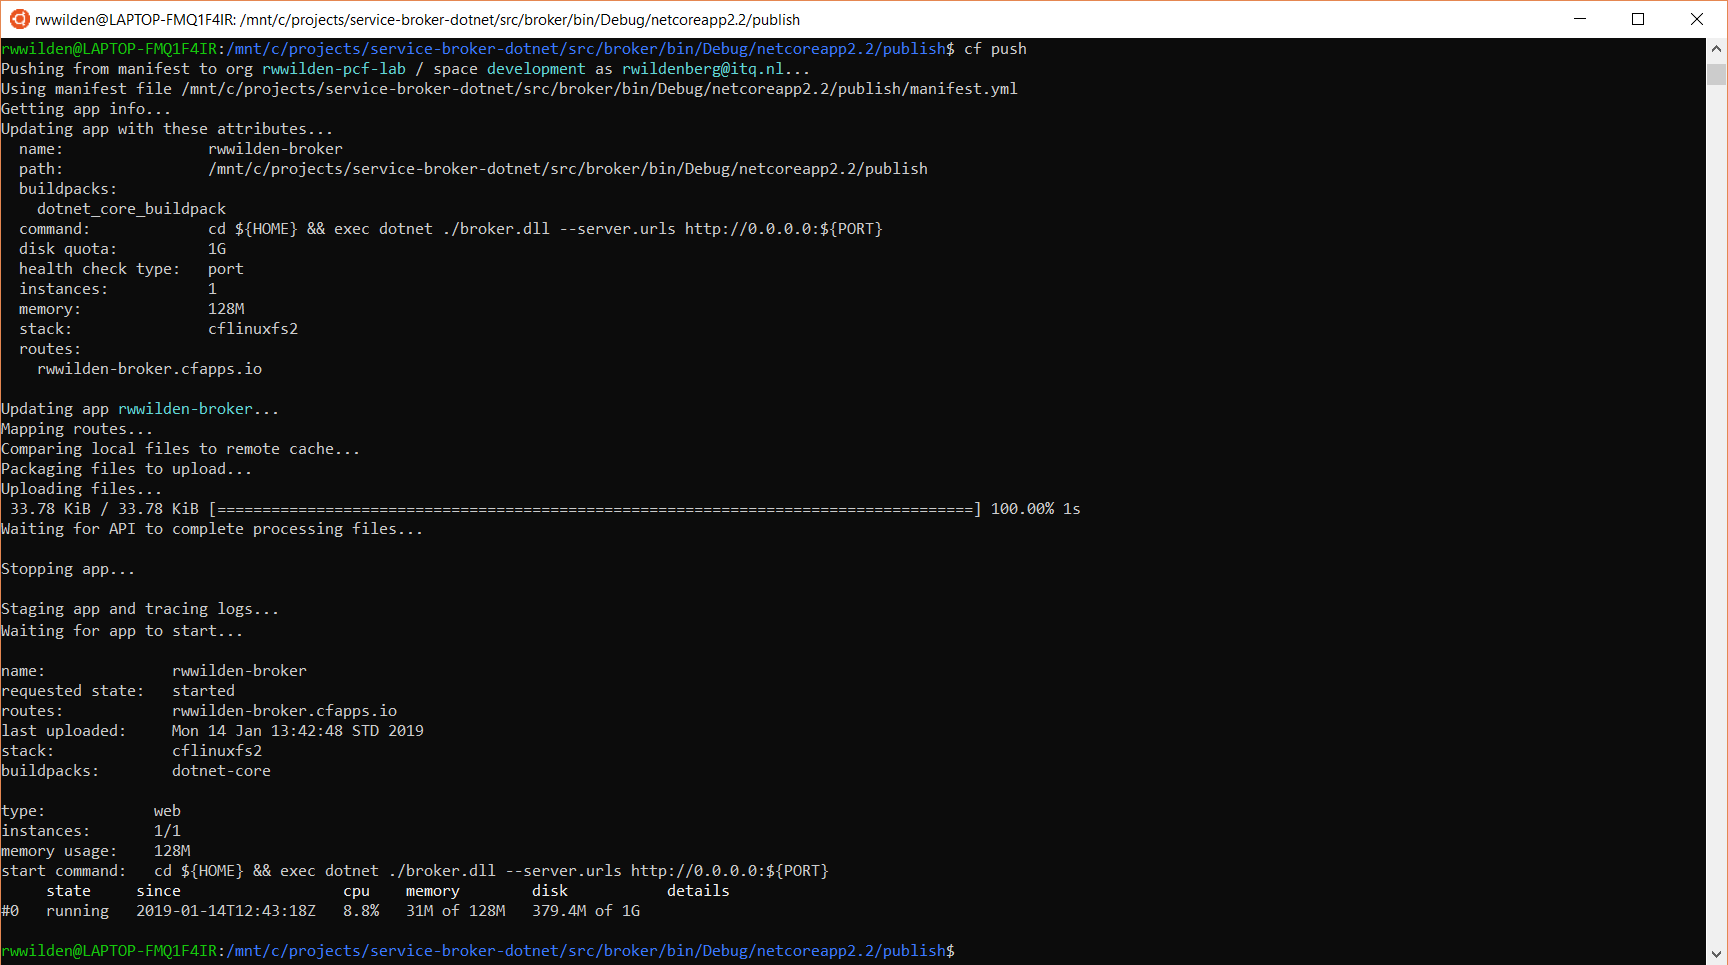
We now have a service catalog up-and-running at https://rwwilden-broker.cfapps.io/v2/catalog:

Service instances
Now that we have a catalog, we need a way to create services from it. For simplicity, we implement the blocking version of service instancing: IServiceInstanceBlocking and leave the asynchronous (deferred) version for a future post. Since we're not actually provisioning anything yet, there is little to implement except some logging statements:
loading...
Platform-to-service-broker authentication
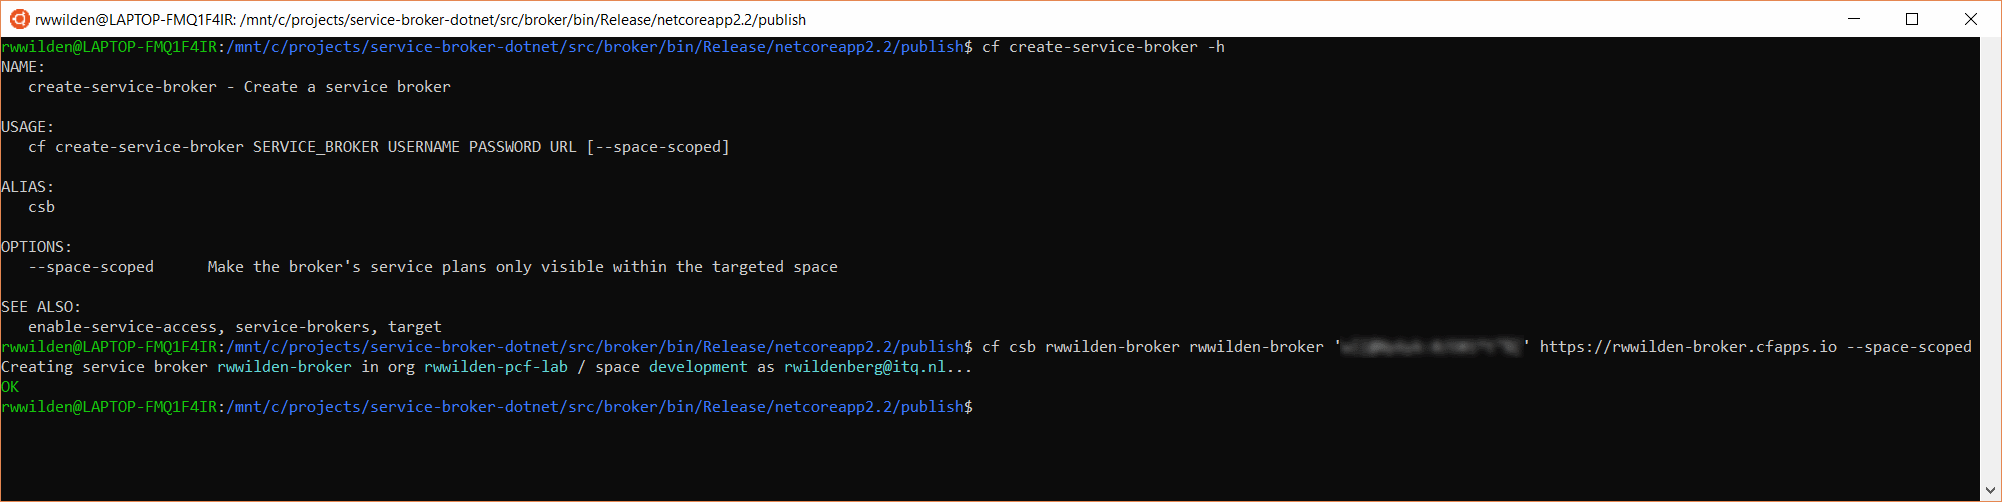
We now have an application that implements a catalog and service (de)provisioning. However, the platform does not yet know that this application is a service broker. In PCF, we can use the cf create-service-broker command to do that. This command requires the name of the service broker, its url (https://rwwilden-broker.cfapps.io) and a username and password.
The username/password are required because communication between platform and broker is authenticated through basic authentication. So the platform and the broker share a secret (username/password) that allows them to communicate. ASP.NET Core does not support basic auth out-of-the-box so we turn to the [idunno.Authentication][15] library. I'm not going to go into the details of configuring this, check out the Startup.cs class in the Git repo. One thing to take into account is that in PCF, the load balancer terminates SSL. Requests to the app are sent in plain HTTP. The idunno.Authentication requires that you explicitly allow HTTP requests since in the context of basic authentication, HTTP is a very bad idea.
The basic authentication password will of course not be hard-coded inside the application but will be read from an environment setting Authentication:Password. So after we push the application, we can use cf set-env to add the password to the environment.
Creating the broker
Now that we have the app up-and-running with a catalog, service (de)provisioning and basic authentication, we can create a service broker from it via cf create-service-broker:
Provisioning and deprovisiong a service
The service broker we deployed exposes the rwwilden service that should be visible in the marketplace:
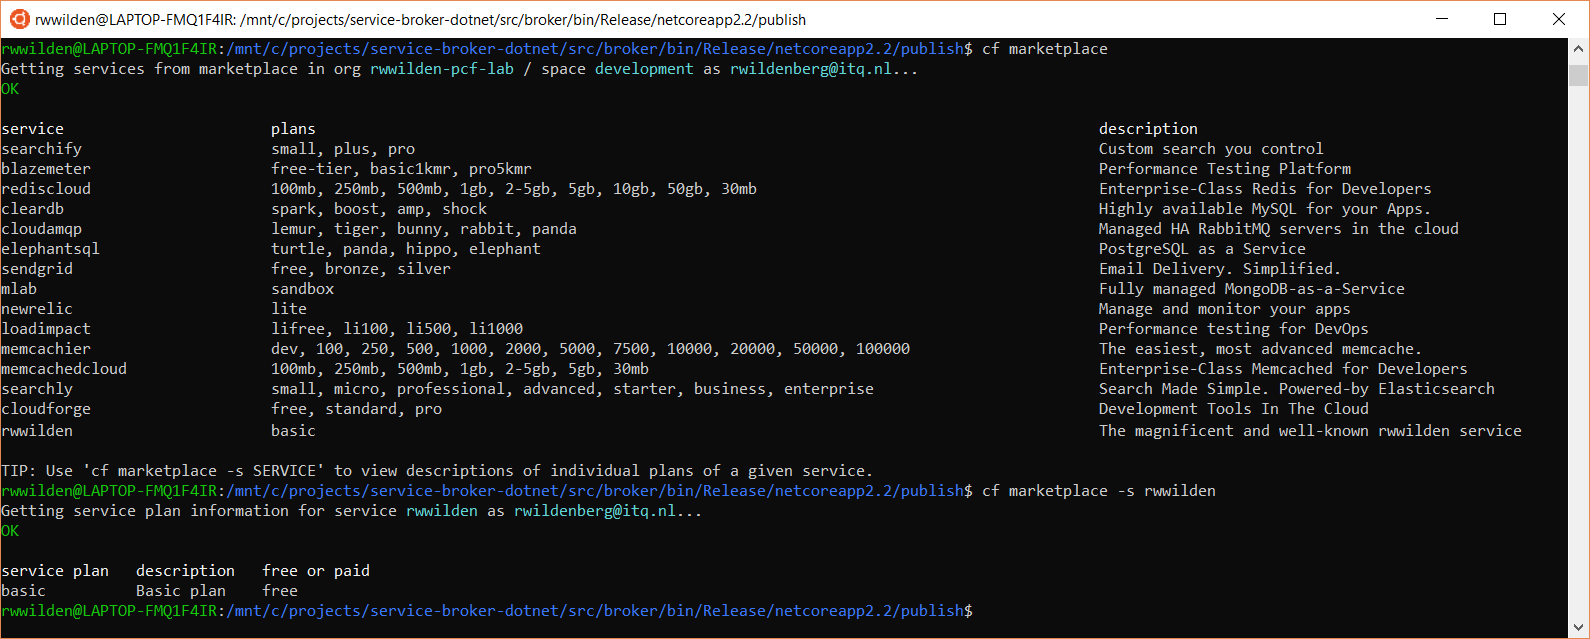
And as you can see, there it is, at the bottom of the list of available services. Note that we made this a space-scoped service so it's only available in the current org and space.
Next we can create a service and delete it again and we have reached the goal of the first post of this series.
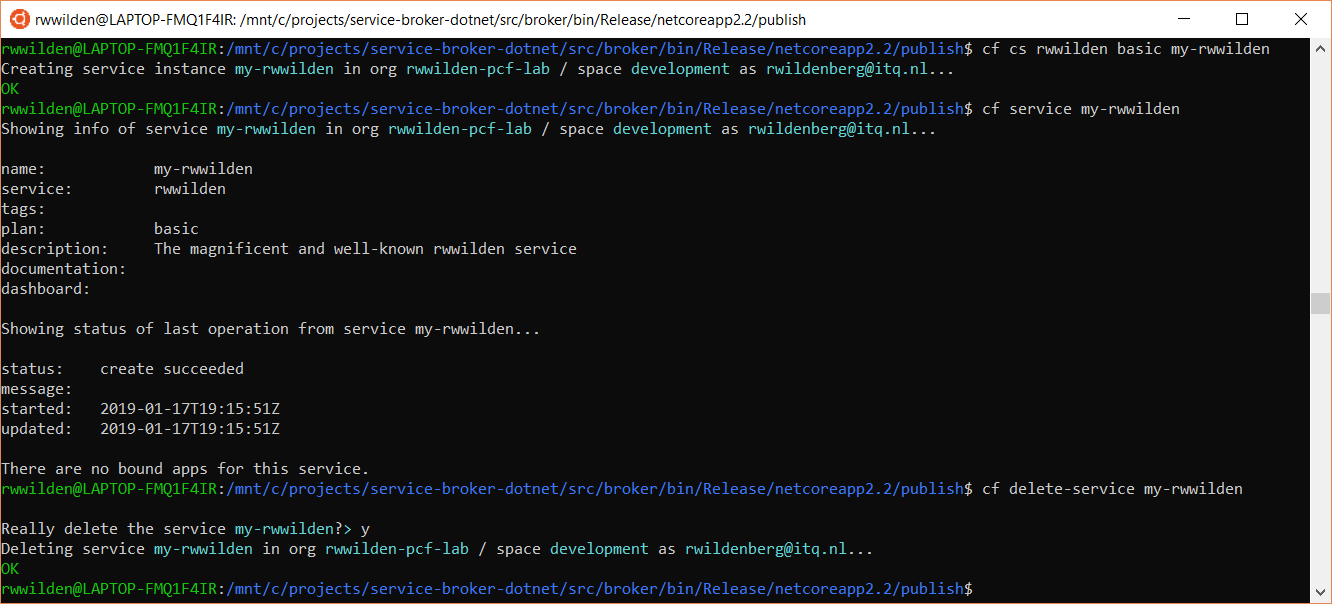
We created a service of the type rwwilden in the basic plan and we named it my-rwwilden. Binding is not yet supported by this service so there are no bound apps.